Fixed windows are a beautiful addition to any home, providing unobstructed views and ample natural light. Unlike operable windows, they do not open, making them ideal for enhancing aesthetics and improving energy efficiency. However, to enjoy these benefits, proper installation is critical. In this article, we will delve into the steps required to install a fixed window, ensuring optimal performance and longevity.

Before installing a fixed window, it's essential to understand its components and advantages. Fixed windows are stationary glass panes set within a frame. They come in various styles, shapes, and sizes, which can enhance a home's architectural appeal. The primary advantage is their energy efficiency; since they do not open, they create a tight seal, helping to reduce energy costs.
To successfully install a fixed window, you will need specific tools and materials, including:

- Measuring tape
- Level
- Caulking gun
- Construction adhesive
- Fasteners and screws
- Insulation materials
- Safety goggles and gloves
Before starting the installation process, safety should be a top priority. Wear safety goggles to protect your eyes from debris and gloves to prevent cuts. Ensure your work area is clear and that you have a stable ladder for higher installations. If the window is large or heavy, enlist the help of a friend to avoid injuries.
Accurate measurements are crucial for a proper fit. Measure the width and height of the window opening at multiple points to account for any irregularities. The fixed window should be slightly smaller than the opening to allow for expansion and contraction. Once you have the measurements, compare them against the window's specifications to confirm compatibility.
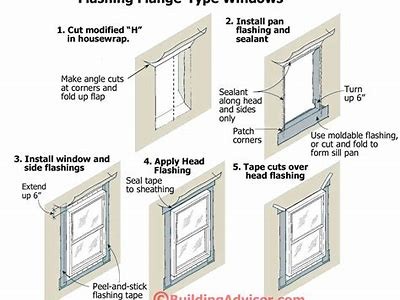
Before installation, ensure that the window opening is clean and free from debris. Look for any rot or damage in the frame and address these issues as necessary. It's also essential to flash the area properly to prevent water damage in the future. Use flashing tape around the edges of the opening to create a weatherproof barrier. Installing the Window
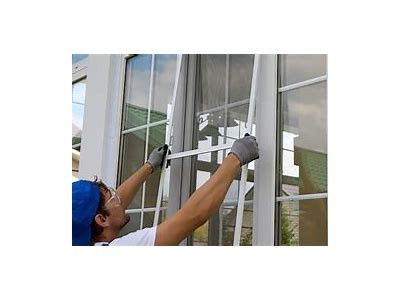
Once the opening is prepared, it's time to install the window. Begin by placing the fixed window into the opening, ensuring that it sits level. Use shims to adjust the height as needed. Once level, check that the window is square by measuring the diagonals. Secure the window in place with the fasteners and screws, ensuring a firm hold. Sealing and Insulating
To avoid drafts and water infiltration, apply a high-quality sealant around the exterior edges of the window. This step is crucial for ensuring optimal performance. Additionally, fill any gaps between the window frame and the wall with insulation material to enhance energy efficiency. Proper sealing and insulation will help maintain a comfortable indoor temperature year-round. Finishing Touches
After the window is installed and sealed, consider adding interior and exterior trim to enhance the overall appearance. This can also help cover any visible gaps. Choose a trim style that complements your home’s design while remaining functional. Paint or stain the trim as desired for a polished look. Maintenance Tips
Once your fixed window is installed, routine maintenance will help ensure its longevity and performance. Regularly check the seals for wear, and inspect the frame for any signs of water damage. Clean the glass periodically using a mild detergent to maintain clarity and prevent dirt buildup. Conclusion
Installing a fixed window can be a rewarding project that enhances both the aesthetic and energy efficiency of your home. By following these steps and ensuring proper measurements, sealing, and insulation, you can ensure optimal performance for years to come. If you're uncertain about any step or prefer to have a professional handle the installation, don't hesitate to reach out for assistance. A well-installed fixed window can brighten a room and add significant value to your home.